
Step 1
Start from the dashboard
Open your DoroSocial dashboard. This is where content items, platform drafts, and publishing status live.
Create your first content item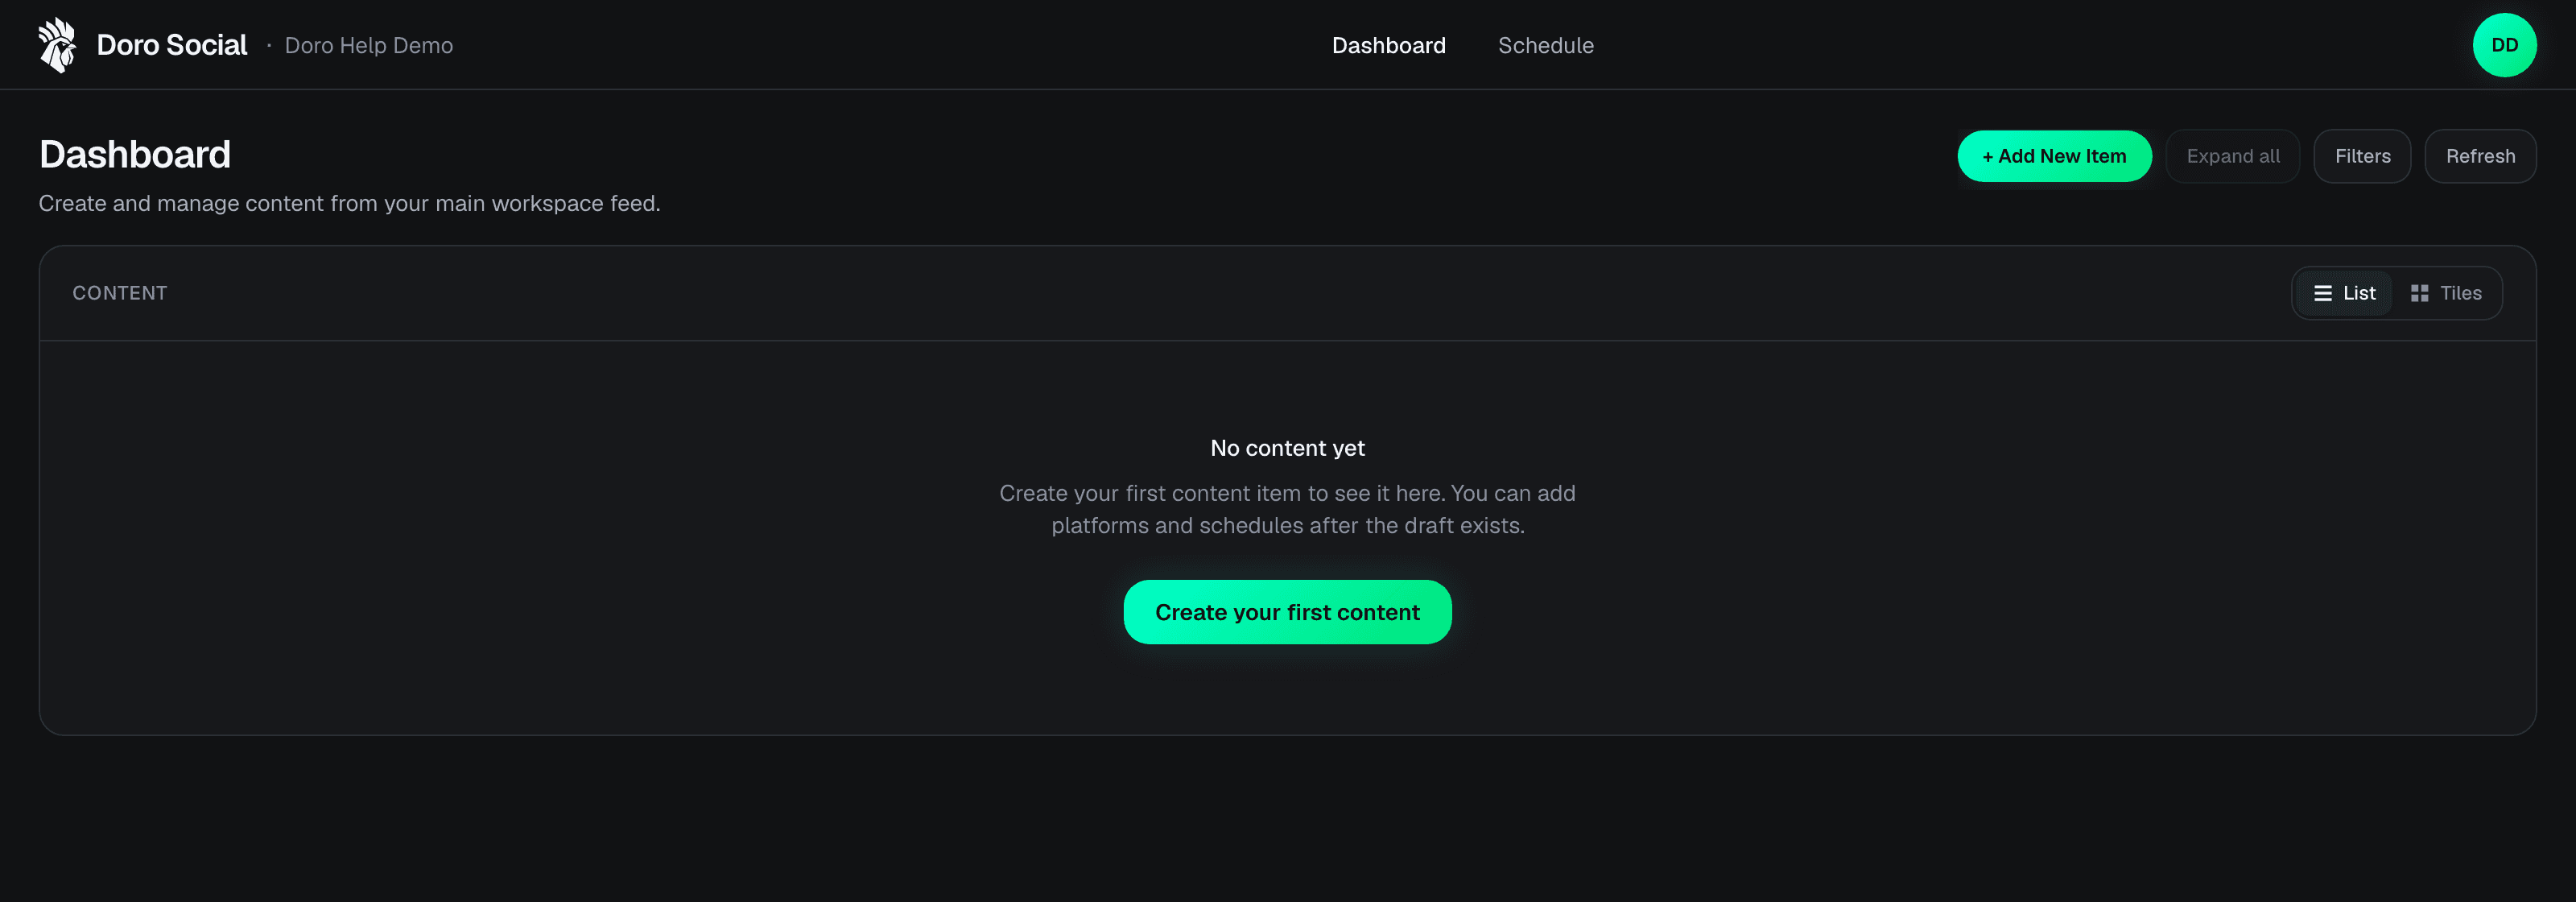
First scheduled post
The fastest activation path is simple: connect an account, create a content item, prepare one platform draft, review it, and schedule it.
This guide connects the main setup tutorials into one first-success workflow. Use it when you want to prove DoroSocial can take one piece of content from idea to scheduled post.
Before you start
Connect at least one social account from Social integrations.
Connect social accountsSafe by default
Uploading media and creating drafts does not publish anything until you choose Publish or Schedule.
Best first test
Schedule one post on one platform first. After that works, expand to more platforms.
Step 1
Open your DoroSocial dashboard. This is where content items, platform drafts, and publishing status live.
Create your first content itemStep 2
Click Add Content, then upload your source video or image. Saving the item only creates a draft in your workspace; nothing is published yet.
Upload a video or image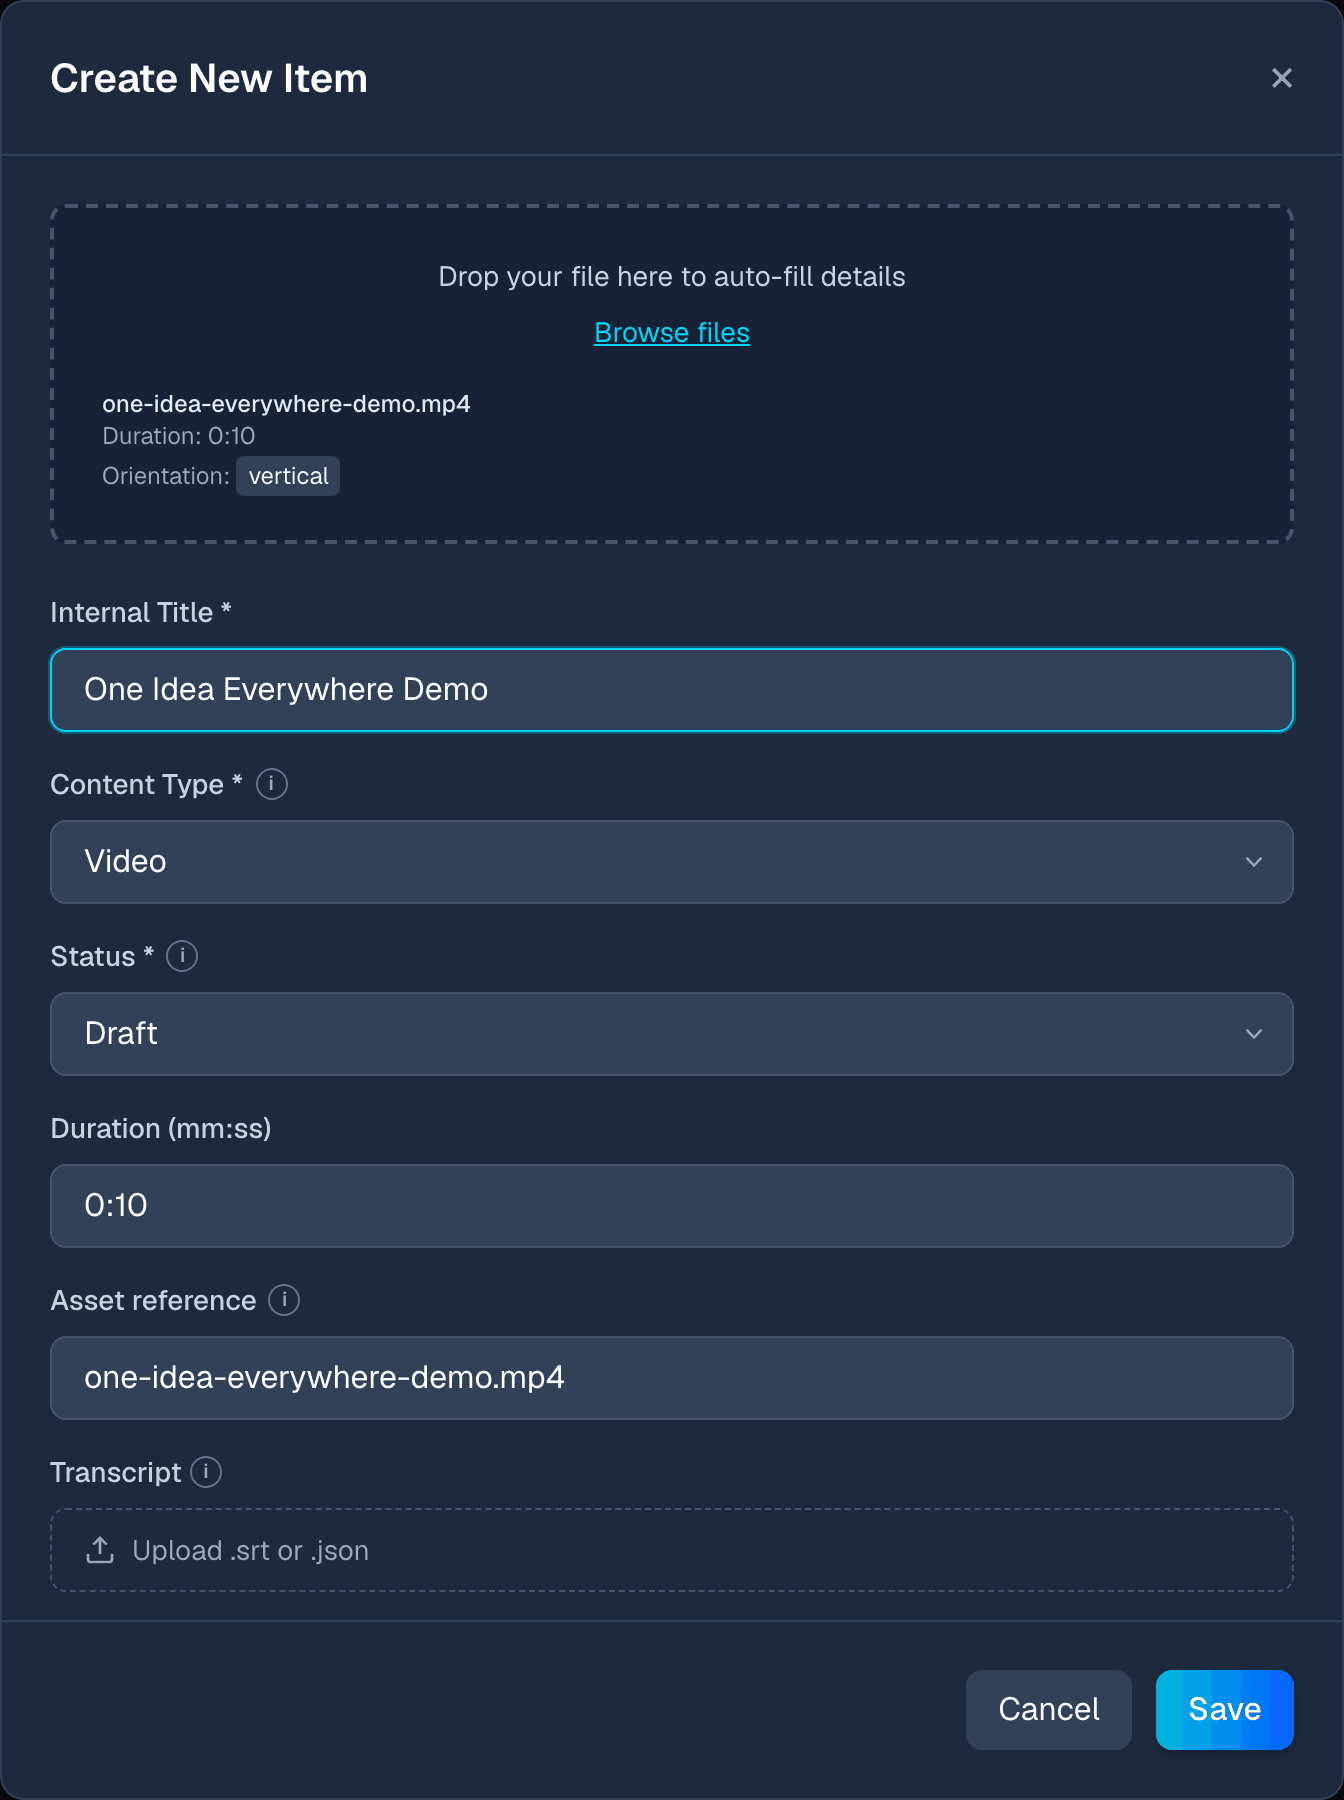
Step 3
Open the content item and create platform posts. You can use AI-assisted generation from transcript/source context or write the platform draft manually.
Create platform posts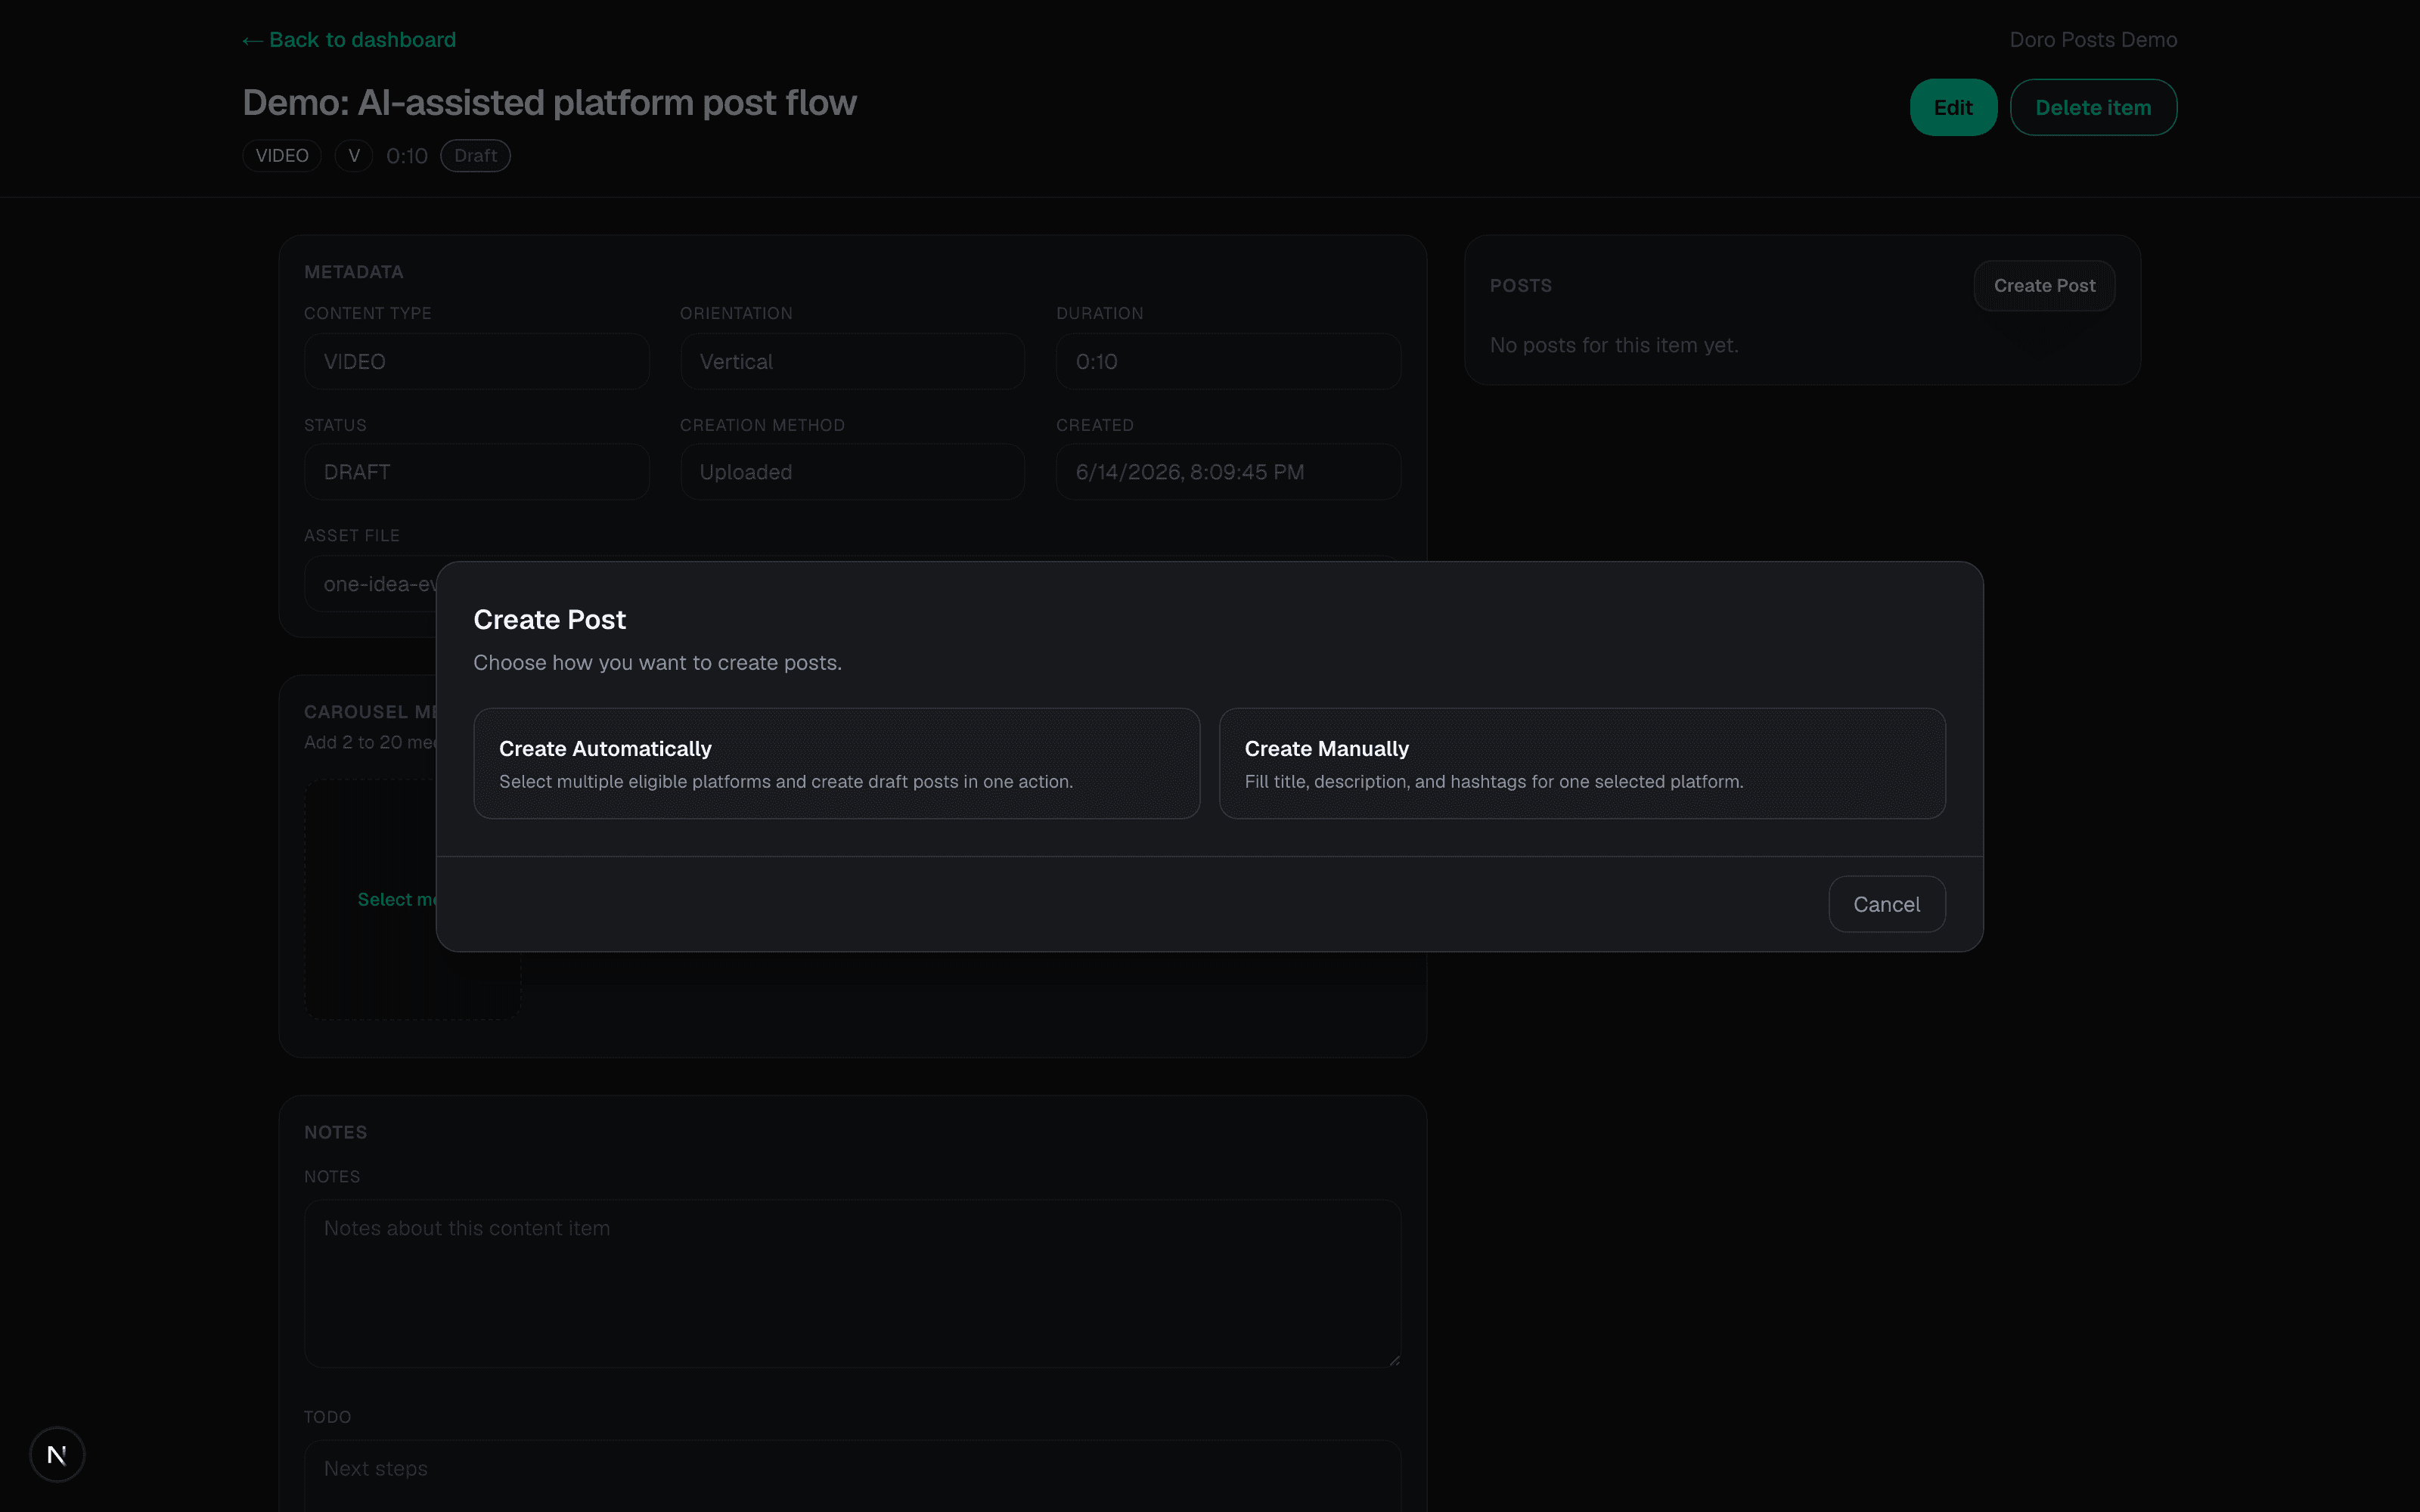
Step 4
Check the title, caption, hashtags, platform fields, and media before you schedule. Fix weak or duplicated text now instead of after it publishes.
Edit platform post drafts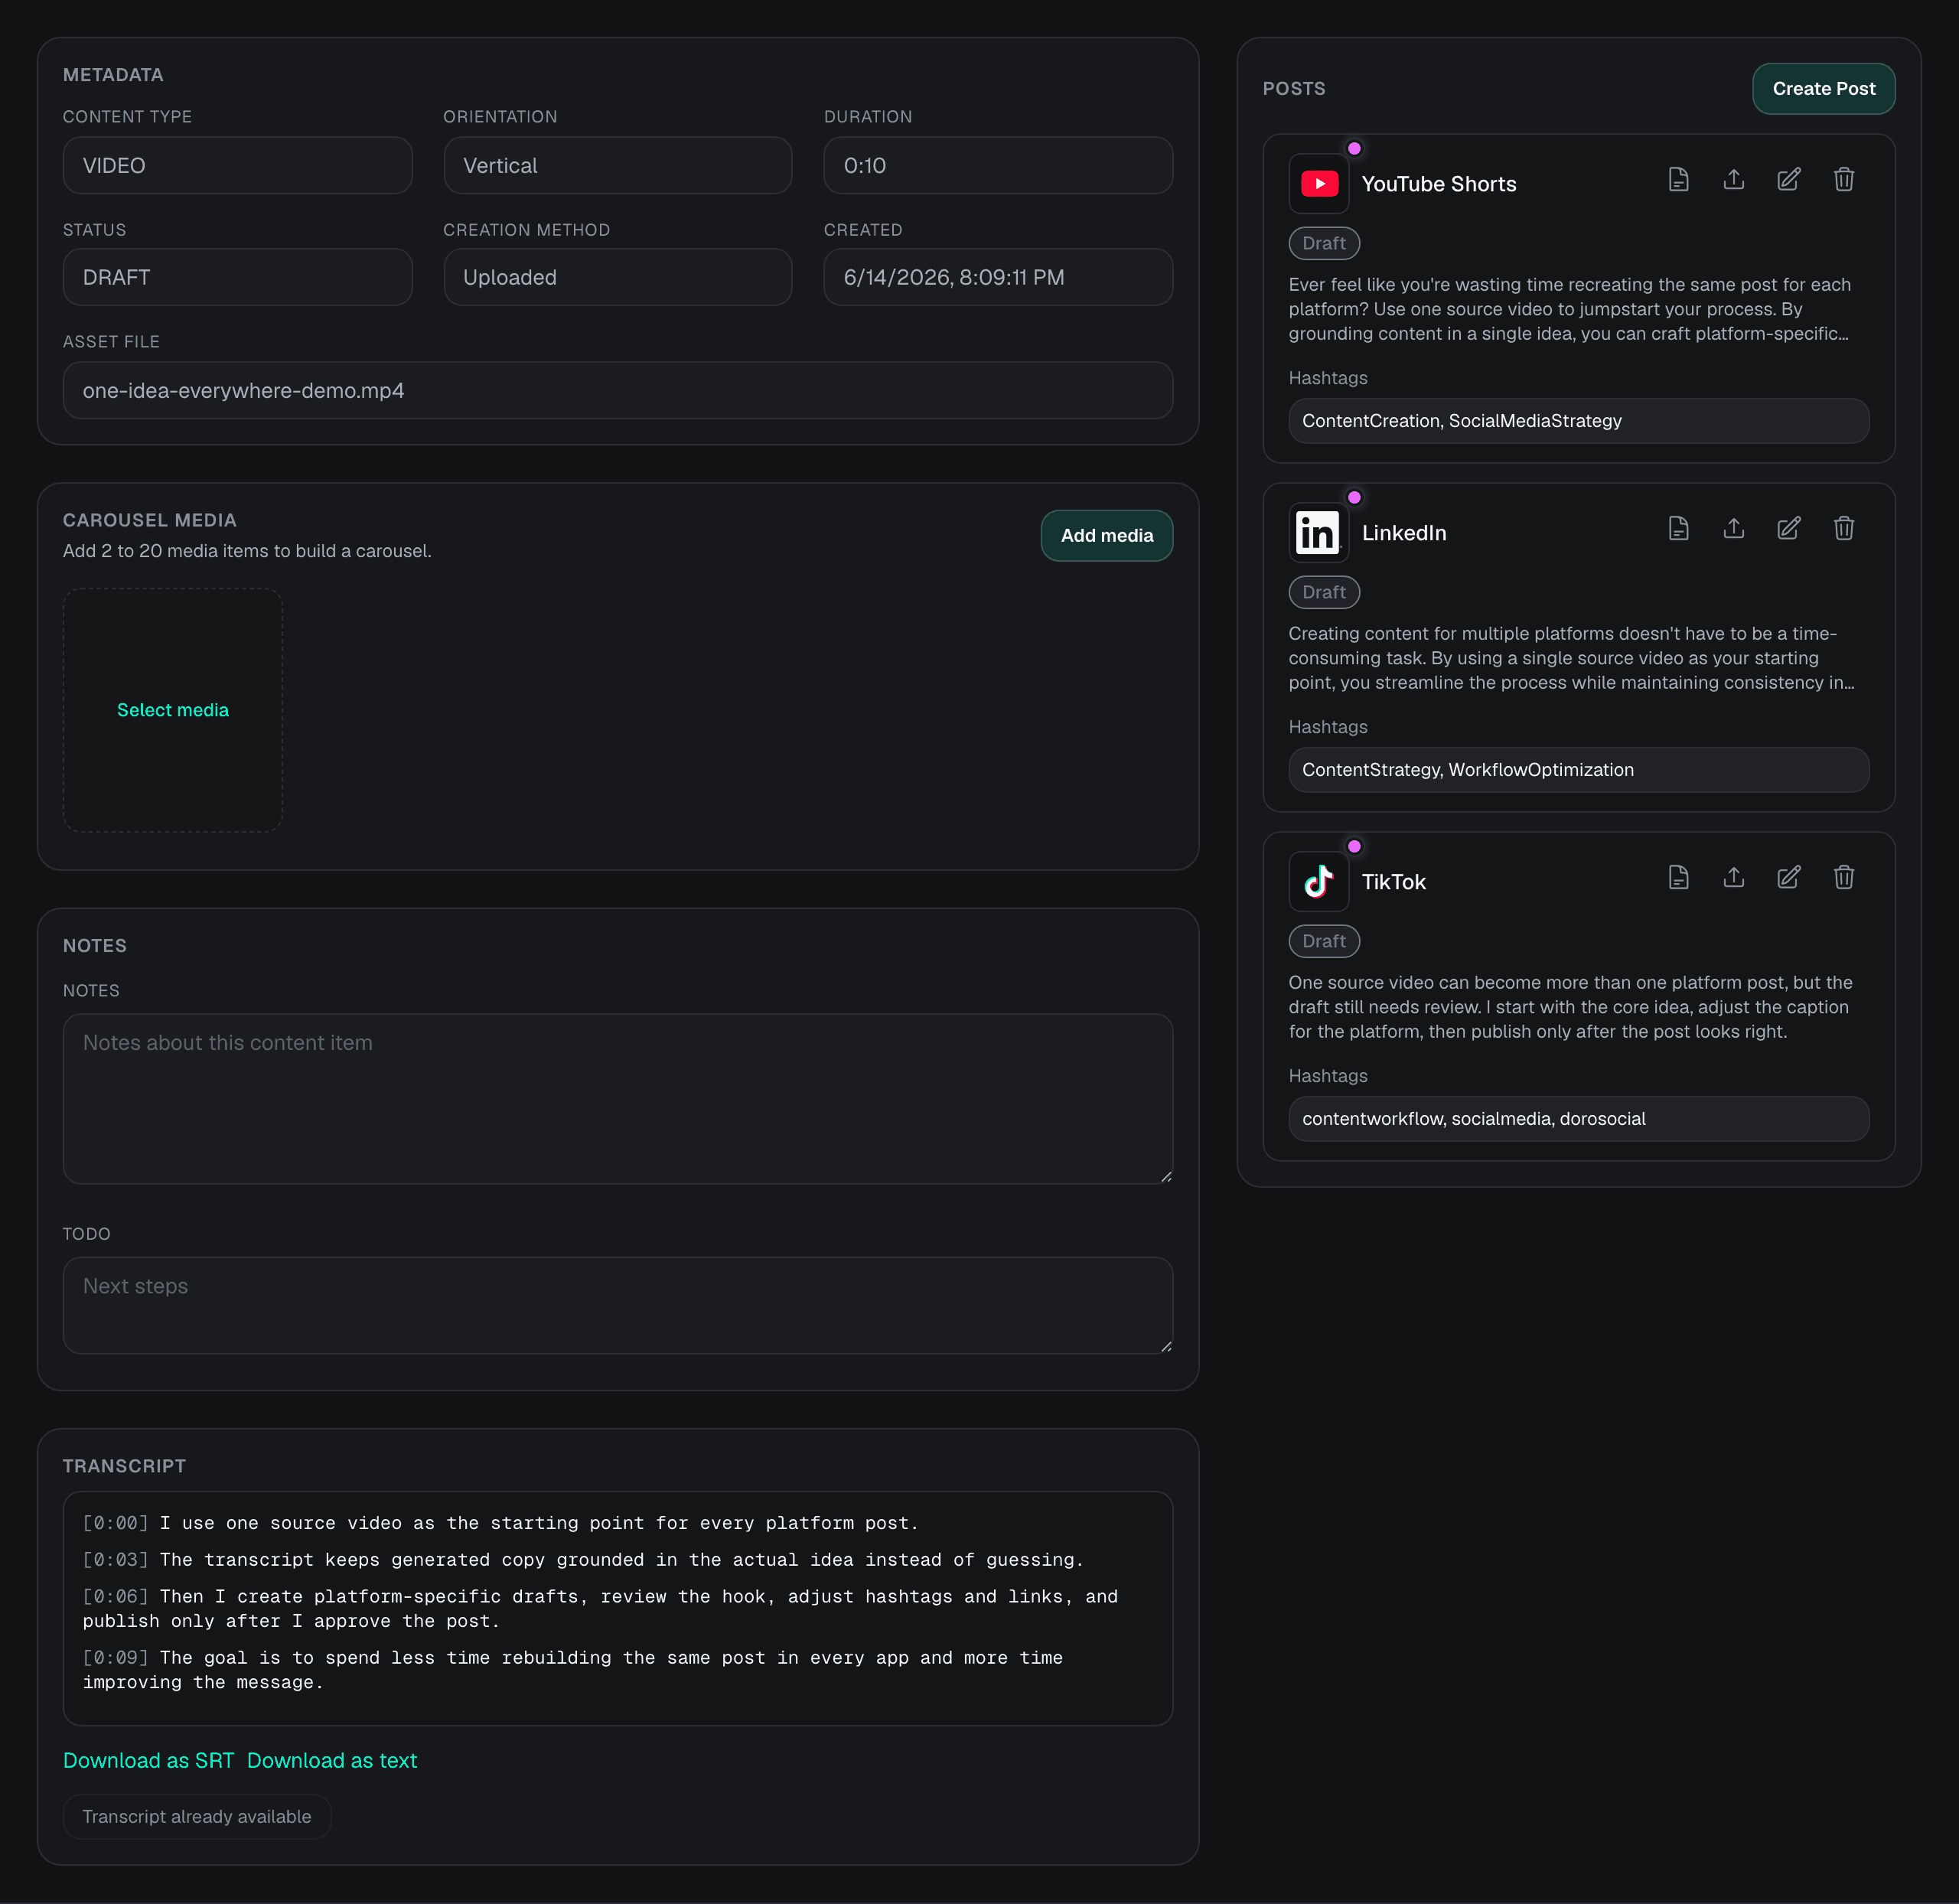
Step 5
Click the publish icon on the draft you want to schedule. DoroSocial opens the publish modal with that platform selected.
Publish or schedule platform posts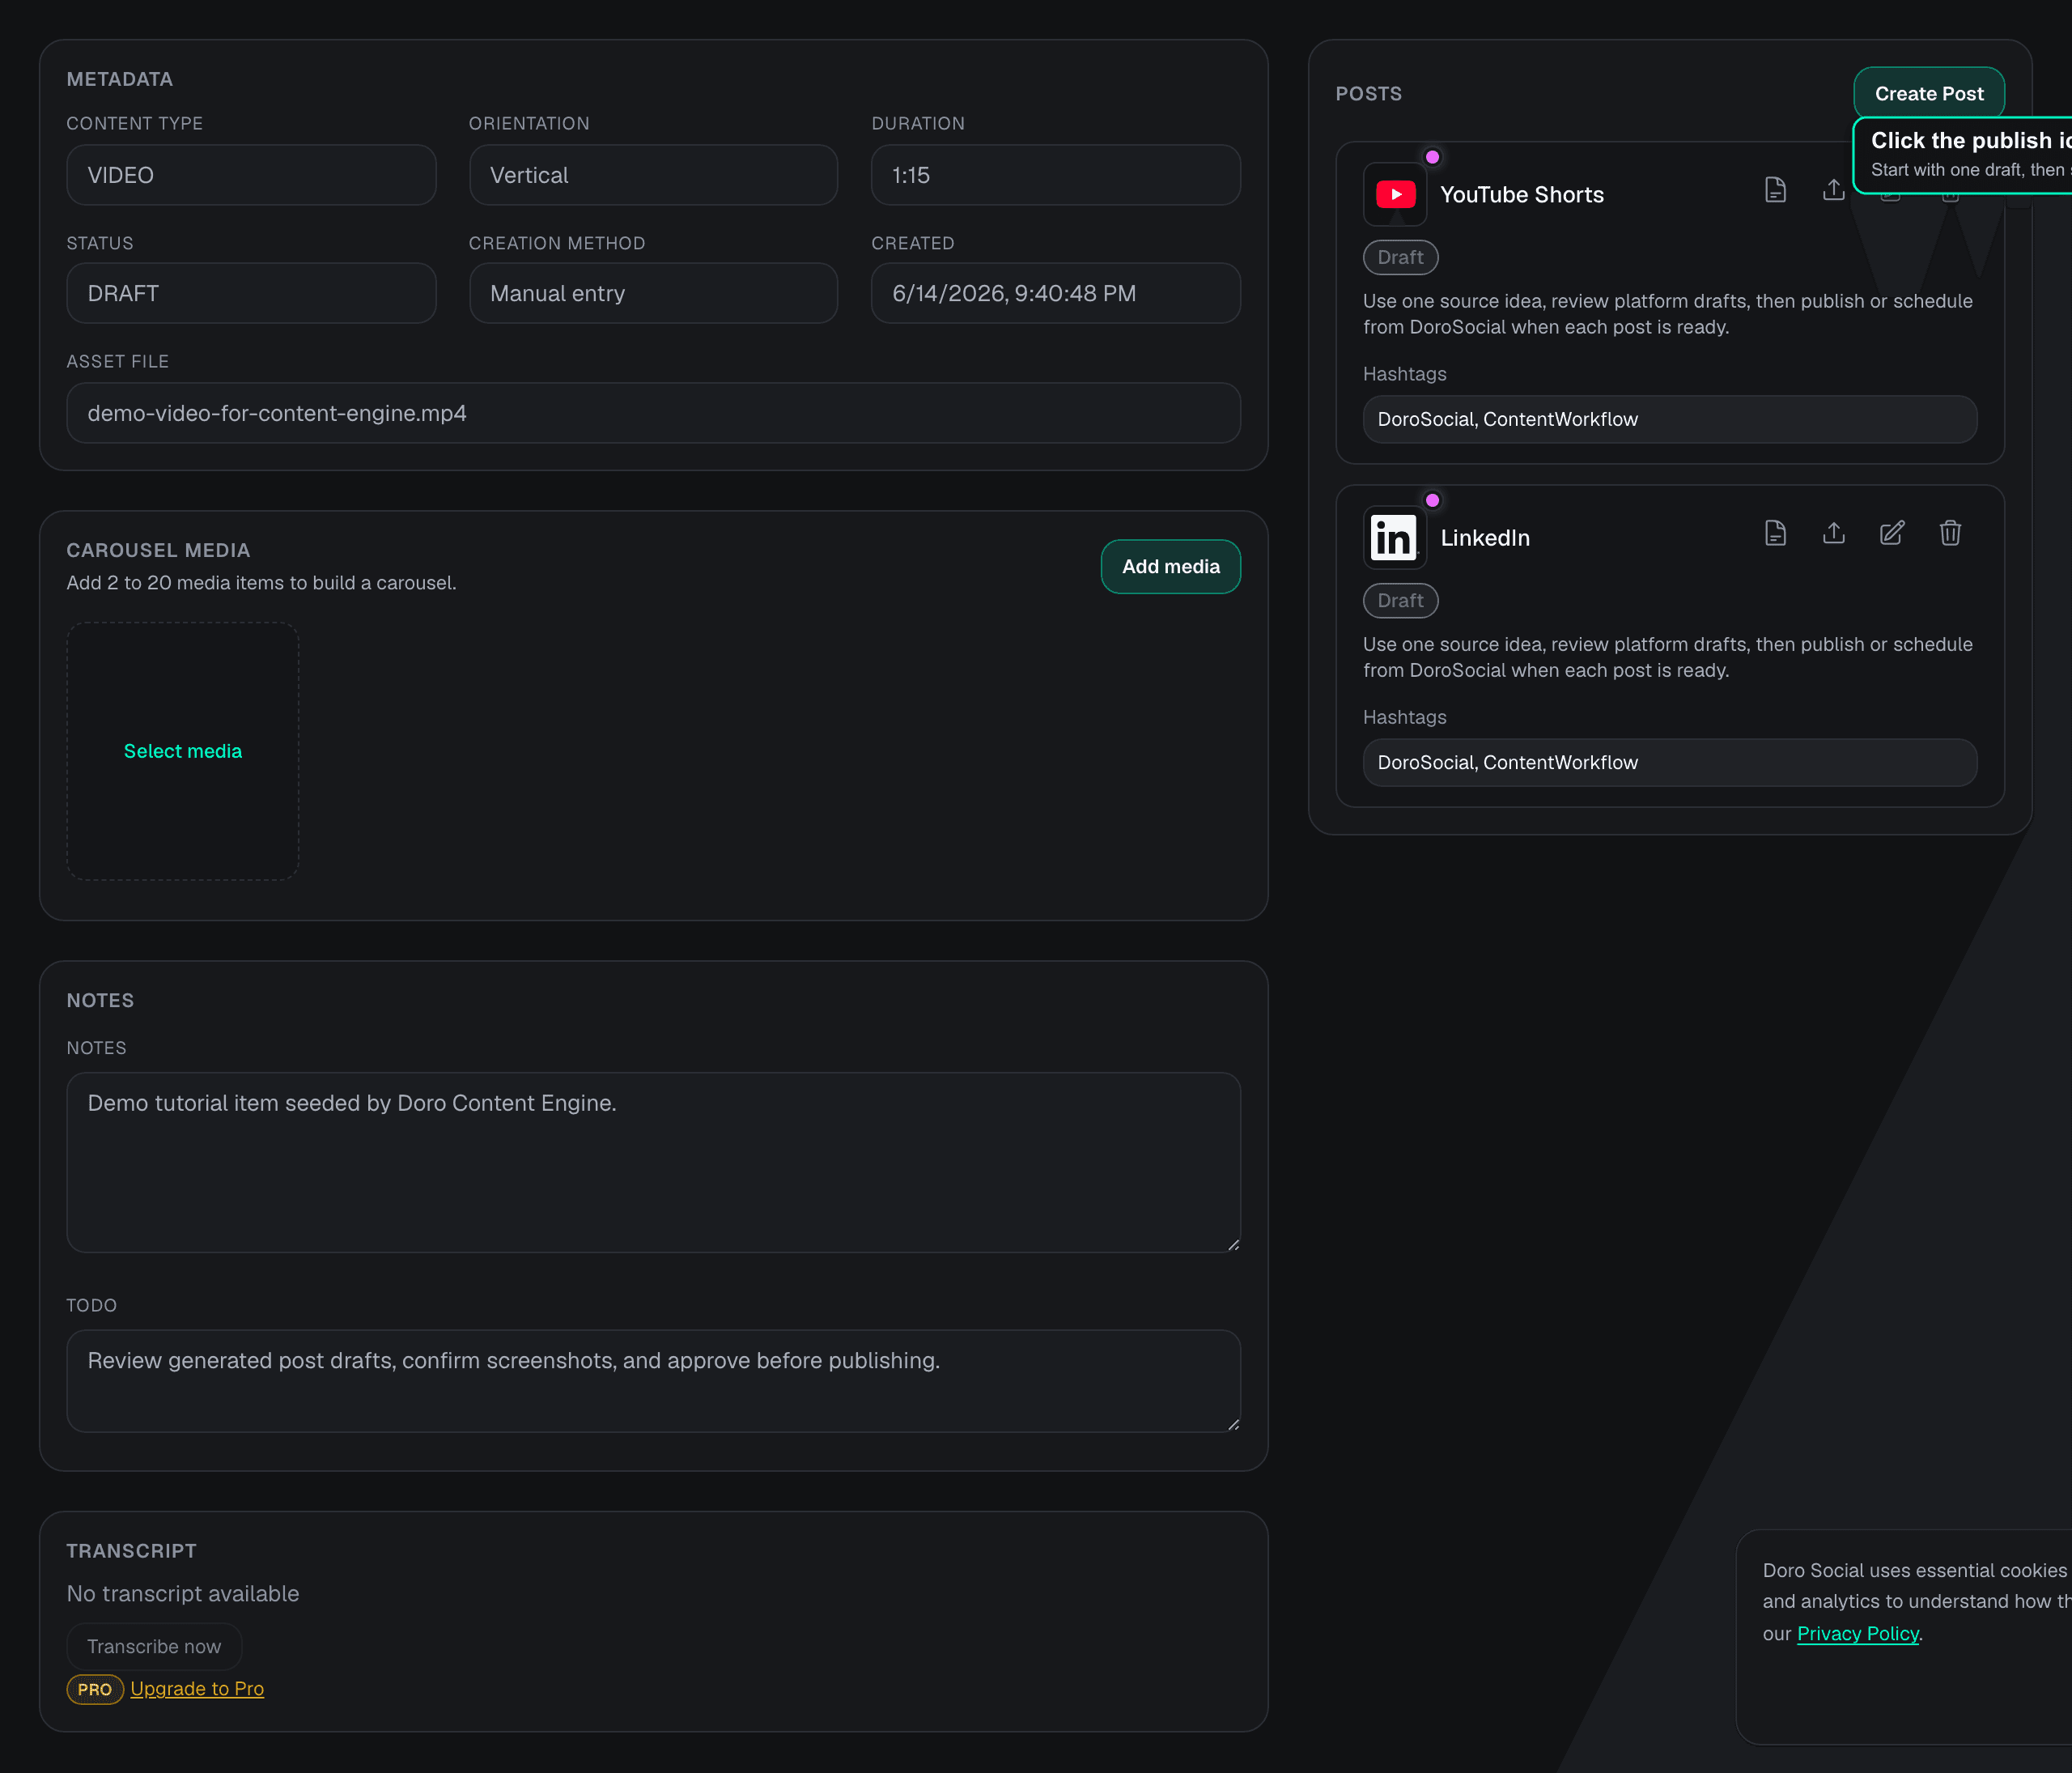
Step 6
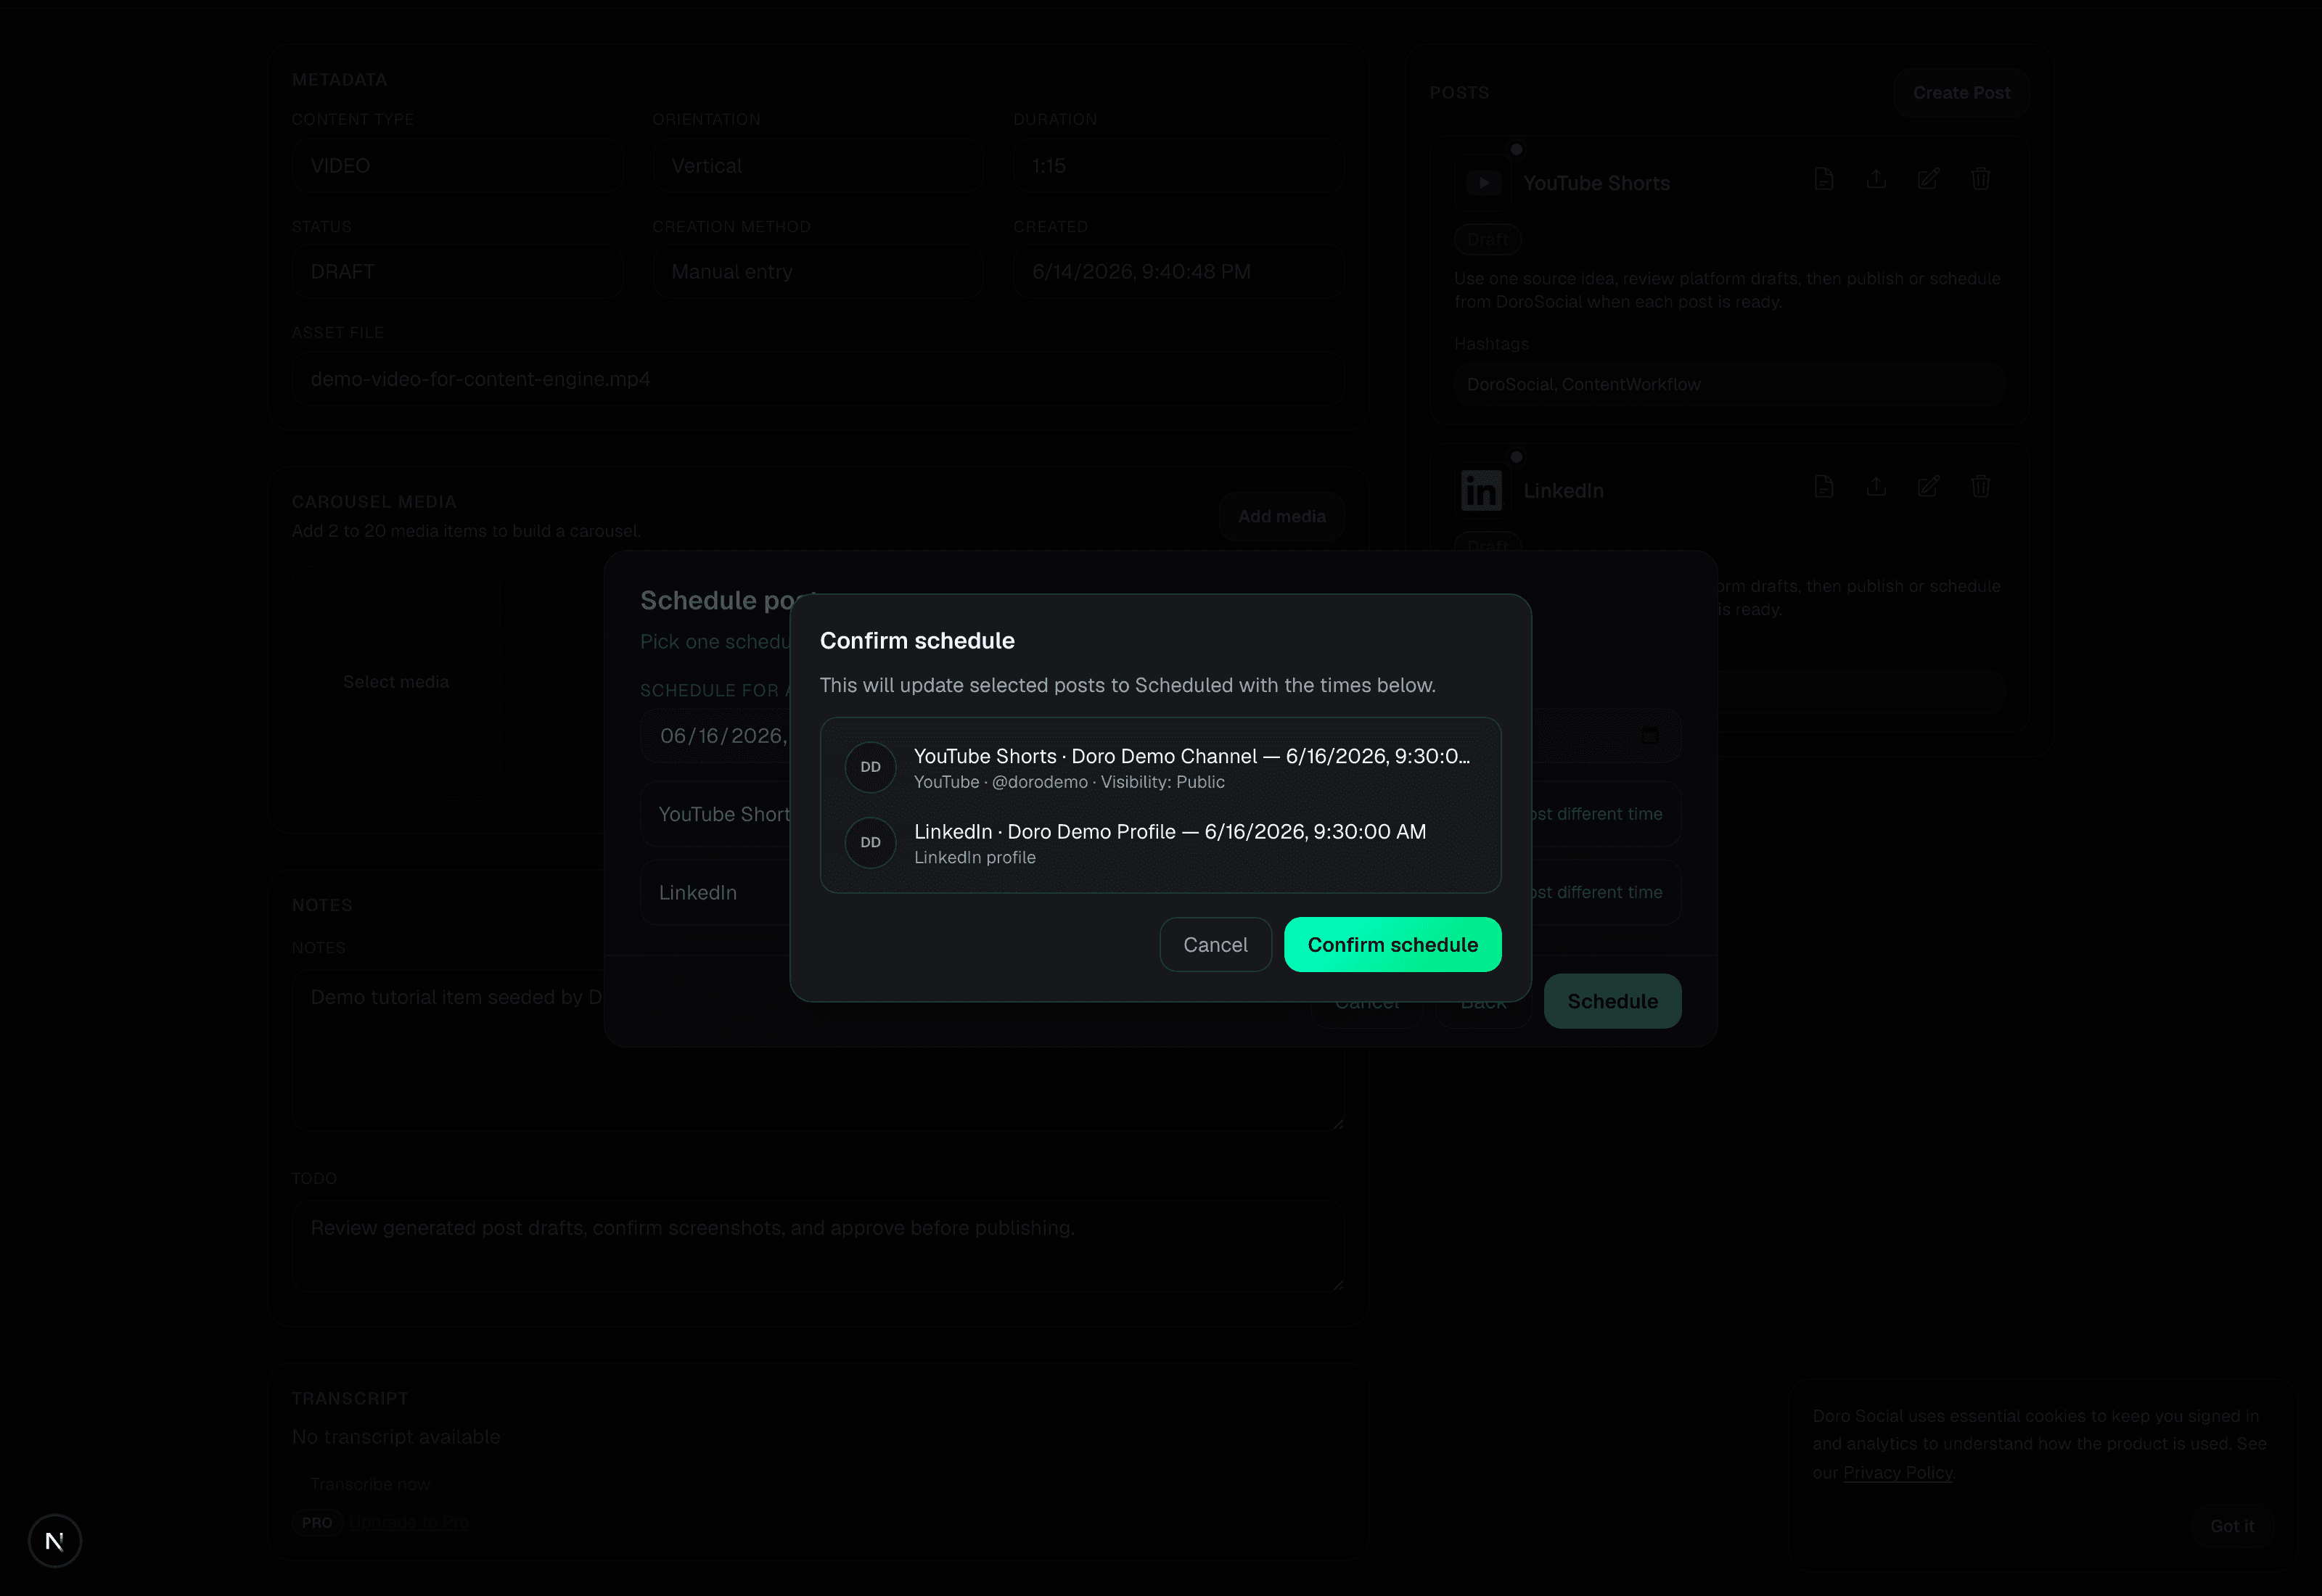
Click Schedule, choose the publish time, then confirm the platform, target account, and scheduled time before saving.
Questions
Yes. A platform draft needs a valid connected account before DoroSocial can publish or schedule it for that platform.
Yes. Create the content item, write a manual platform draft, review the fields, then schedule it from the publish modal.
No. A content item is a workspace record. It does not publish until you create a platform draft and choose Publish or Schedule.
Check the selected platform settings, connected account, source media, and any platform-specific required fields. The publish modal usually shows what still needs attention.
Ready to schedule
Open the dashboard, create one item, and schedule one post. That first scheduled post is the activation milestone.